The Echoes of Victory Ridge quest looks tiny on paper and turns into a wild goose chase in practice. The objective text points you to a “hideout under the broken highway,” and the map drops a marker on a region rather than a precise box. That gap is where most players burn a full run. The patch itself sits in one specific spot at the West Broken Bridge POI in the northern Dam Battlegrounds, and once you grab it the only real test is getting topside alive.
This guide gives you the exact location, the fastest line to it, and an extraction plan that survives contact with ARC patrols.
Quick verdict before you drop in
This is one of the easier campaign quests Celeste hands out, but it punishes one mistake hard: dying with the patch in your main bag wipes the step. Bring an augment with a safe pocket and the run becomes low-risk. Skip it and you’re gambling a whole insertion on a clean extract.
Who this is for: anyone early in the campaign who wants a fast quest clear and a feel for the Dam Battlegrounds layout. Who should wait: players with no safe-pocket augment and no spare gear, since a death near the surface can cost both the item and your loadout. The single thing to check before you queue is your augment slot. Everything else is movement.
Step one: reach Victory Ridge
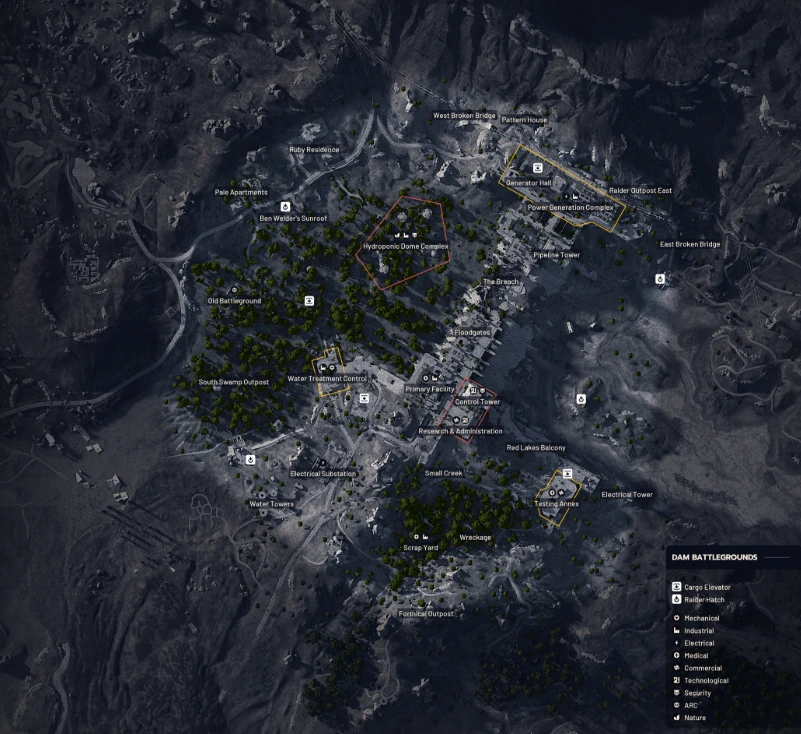
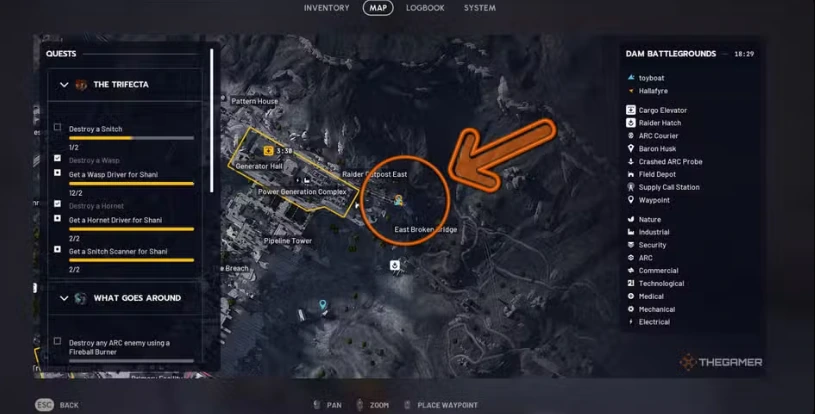
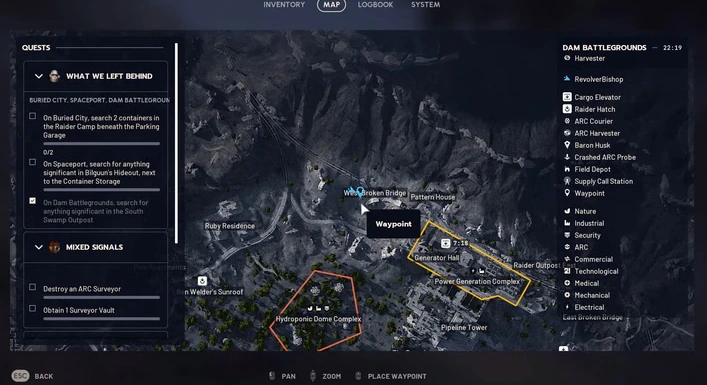
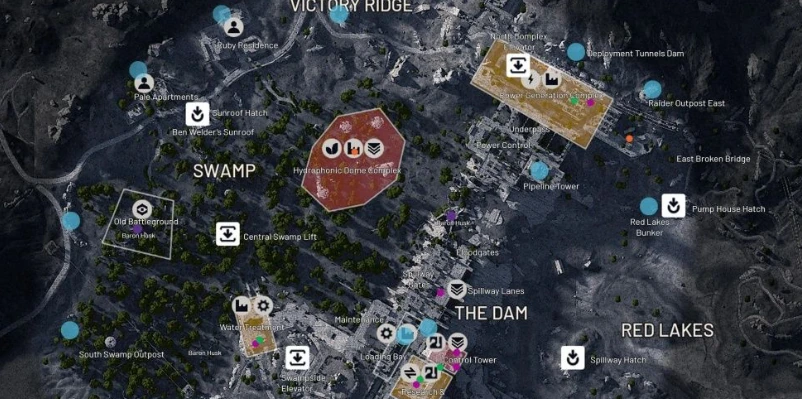
Victory Ridge isn’t a labeled marker. It’s the West Broken Bridge POI in the northern part of the Dam Battlegrounds, sitting on the northwest side of the Power Generation Complex. Open the map, zoom into the top edge, and pin West Broken Bridge as your drop or your first waypoint. The moment you physically arrive in that zone, the first objective ticks complete on its own.
The northern stretch reads as quiet in most matches, but “quiet” here means fewer bots, not zero. ARC patrol routes cut through the complex, and the occasional elite spawn can ruin a careless approach. Use the elevation. The ridge terrain gives you sightlines and cover that flat scrapyard fights don’t, so stay high and read the patrol patterns before you commit to the bridge.
A small edge most players miss: rain and fog cycles shrink ARC detection range noticeably. If the weather rolls in, that’s your window to push the bridge without drawing a patrol onto your back.
What about other Raiders
This area pulls in other questers chasing the same patch. You’ll sometimes share the POI with a player who wants the exact box you do. There’s no script for that moment. You can wave it off and split the loot, or open fire the second you see them. Just remember that a firefight near the surface is the worst possible time to be holding an unsecured quest item, so weigh the trade.
Finding Major Aiva’s Patch
This is the part that traps people. At West Broken Bridge you’re looking for collapsed highway debris, a cluster of broken-down cars, and chunks of fallen road. There are two broken-highway sections in the area, which is exactly why players end up at the wrong one. You want the West Broken Bridge specifically, not the other span.
The visual landmarks that confirm the right spot: a group of rusted barrels and a blue tarp draped over the debris, forming a rough tent. There’s a slanted concrete slab you can crawl under, easiest to read if you stand at the northern end of the POI and look south, near a wrecked vehicle.
Crawl beneath that angled slab. On the ground you’ll find a small metal box that looks identical to the delivery boxes you drop at Field Depots, except this one carries a special interaction prompt. Interact with it (E on keyboard, X on controller) and it pops open to drop the trinket: Major Aiva’s Patch, which holds the battle plans Celeste wants.
The instant it lands in your inventory, move it to your safe pocket. Don’t loot the surrounding area first, don’t admire the find. Secure the item, then think about everything else. That one habit is the difference between a clean clear and a repeat run.
Extracting without losing the patch
With the patch secured, head east toward the North Complex Elevator. It’s the closest reliable extract from the bridge, and the short distance keeps your exposure low.
The catch is that ARC units patrol the North Complex heavily. Call the elevator, then read the room. If you’ve pulled aggro and can’t win the fight cleanly, fall back to cover rather than trading shots in the open while you wait for the lift. The elevator takes time, and standing in it under fire is how good runs die.
If the North Complex looks compromised before you even get there (lingering smoke, gunfire, or another squad working the extract), don’t force it. The Dam Battlegrounds has multiple extraction points, so pivot to a backup like the Generator Hall lifts instead of pushing into a fight you didn’t plan. A slightly longer route with no contact beats a short route through three ARC troopers every time.
Because the patch is already in your safe pocket, even a death on the way to extract won’t cost you the item, only your run. That’s the whole point of the augment. But a clean extract still saves you the time and gear of re-inserting, so play the exit like it matters.
Wrapping up the quest
Once you’re back in Speranza, open Celeste’s tab and turn in Major Aiva’s Patch to close out Echoes of Victory Ridge. The current rewards for the quest are 6x Crude Explosives, 2x Processor, and 1x Music Box, which is solid early-game material for crafting and trading. A short cutscene plays on turn-in and feeds into the next thread of the campaign, so finalize it immediately rather than leaving the item sitting in your stash where it could get sold by mistake.
If you only take one thing into this run, take the safe pocket. The location is fixed and the route is short. The patch is forgiving right up until you forget to secure it, and that’s the only way this quest beats you.